In this Photoshop tutorial, I’ll show you how to use A Photo With More Photos Technique in Photoshop to gather together a collection of images, place them all on one document and then blend them into a main image so they show through.
Final Image Preview
Take a look at the image we’ll be creating. You can view the final image preview below or a larger version here.(download 43mb full size image,)
Step 1
The first step is to create a folder in which to place all the images you want to use as the background .
make sure
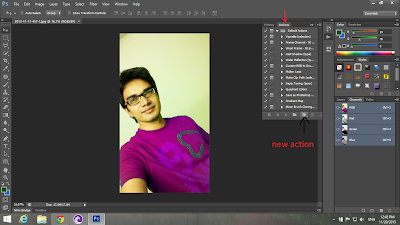
you put duplicates of the originals in here. Then we’ll create an action, open up one of the images and then select Window
> Actions. Click the action menu at the top right of the palette and select New Action.
.png)
Step 2
When this window appears, click Record and all your movements will now be recorded.
Step 3
Go to Images > Image Size and uncheck Constrain Proportions, but check Resample Image. Type 1cm in Width an Height fields
and make the resolution 200ppi. Click OK and then save the image. Close the window. Now click the gray square at the
bottom of the Actions palette to stop recording.
Step 4
Now turn an action into a droplet. Go to File > Automate and select Create Droplet. Hit the Choose button to set a save
destination for the droplet, pick the resizing action you’ve just created from the Action pull-down menu and click OK.
Step 5
Go back to the file of photos you selected earlier and then highlight them all. Now drag them over to the droplet icon to
be converted into 1cm x 1cm squares. It will take a while.
Step 6
Once the image are all converted, it will be time to put together the background mosaic. This is done using the Contact
Sheet II Photoshop plug-in. If you are working in Photoshop CS4, you need to download and install the plug-in. Here are
To get it going, pop over to File > Automate > Contact Sheet II.
Contact Sheet II needs to know which photograph to turn into a contact sheet, so hit Browse and navigate to where they
are. Once you have selected the photos to be converted, move down to the Document area and type in your measurement. I
used 1280px by 800px at 200ppi, but you can set your own. Make sure Flatten All Layers is ticked. Now enter how many
columns (across) and rows (down) you need. Because our photos are 1cm squared, this is a straight one-to-one ratio. Tick
the Rotate For The Best Fit box and then put 0 in the Vertical and Horizontal areas. This will ensure there are no gaps in
the sheet. Hit OK to create the sheet.
Step 7
Contact Sheet will present a small thumbnail giving you an idea of how its looks. It will also tell you how many
photographs you have in your chosen source images folder. If you haven’t enough photos to fill the space, copy and paste a
section to fill the document.
Step 8
Open your main image, select all and then copy and paste into your contact sheet. And you’ve done.
Final Result

.png)
.png)
.png)
.png)
.png)
.png)

No comments:
Post a Comment